Securing shelves, televisions, or large artwork requires more than just a simple nail. For a truly safe and durable hold, you need the right fasteners. Wall anchors are essential for this task, providing the necessary support to prevent damage.
These devices work by distributing weight across a broader area of your wall surface. Expert Jeff Huynh explains that when installed correctly, an anchor expands behind the drywall. This creates a firm grip using friction and support, ensuring your heavy items stay securely in place.
This guide will walk you through the entire process. You will learn to identify your wall type and choose the perfect anchor for the job. We cover precise installation techniques for a professional, long-lasting result that protects your walls and your valuables.
Understanding Wall Anchors and Their Purpose
Before starting any project, it is crucial to grasp the fundamentals of the tools you are using. This knowledge ensures a safe and effective outcome for your home improvements.
What Are Wall Anchors?
Many common interior surfaces, like drywall, are hollow. A standard screw cannot get a firm grip in this material. A wall anchor is a specialized fastener that solves this problem.
Drywall consists of compressed gypsum with a paper backing. It is not solid enough to hold significant weight on its own. These devices are inserted into a pre-drilled hole.
Once in place, the anchor expands behind the wall surface. This action spreads the load over a larger area. The result is a secure hold that prevents tearing or sagging.
Benefits for Heavy and Lightweight Items
The primary advantage is flexibility in placement. You are not limited to mounting objects only on wooden studs. This allows for optimal positioning of shelves, mirrors, and televisions.
For substantial objects, anchors provide the necessary load-bearing capacity. They offer peace of mind by securely holding valuable items. Even a small picture frame benefits from the added stability.
Without this support, screws can gradually work loose over time. Proper use prevents accidental falls, protecting both your possessions and the wall itself.
Identifying Your Wall Type
The foundation of a secure installation begins with knowing exactly what your wall is made of. Using the wrong fastener for your wall’s composition can lead to failure and damage.
There are three primary wall substrates you will encounter. Each has distinct properties that affect which anchor you need.
Differences Between Drywall, Plaster, and Masonry
Drywall is common in modern homes. It features a gypsum core between paper layers, creating a hollow, relatively soft surface.
Older homes often have plaster walls. These are built by applying plaster over narrow strips of wood lath attached to the studs. This creates a much denser and more solid structure.
Masonry surfaces include concrete, brick, or stone. These are the most solid wall type, requiring specialized fasteners for a strong hold.
How to Determine Wall Composition
A simple knock test is the easiest way to check. Tap the surface with your knuckle. A hollow sound points to drywall.
A solid, dense sound suggests either plaster or masonry. You can also check near an electrical outlet by removing the cover plate to see the edge of the material.
Knowing your wall type ensures you select an anchor designed for its specific characteristics. This step is essential for a safe and lasting result.
Selecting the Right Anchor for Your Project
Proper anchor selection ensures both safety and durability for your wall-mounted items. Home improvement specialist Ryaan Tuttle emphasizes checking the weight rating first. “These devices are rated for a certain amount of weight,” he notes. Choosing the correct size prevents failure.
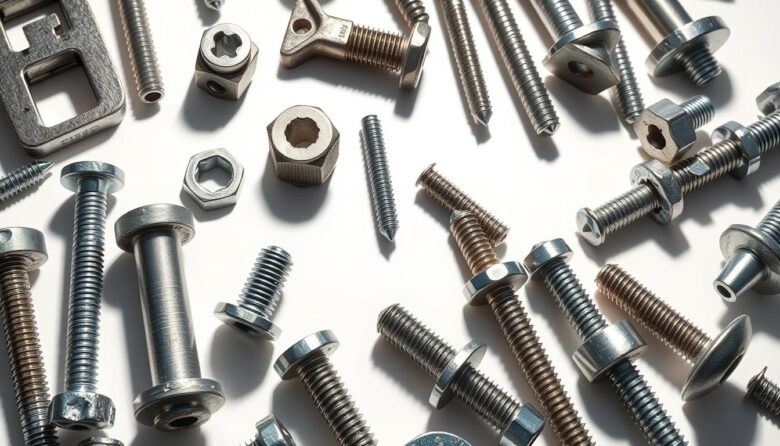
Anchor Types and Their Weight Ratings
Different anchor types serve specific purposes. Plastic expansion anchors work well for lightweight items under 10 pounds. They create friction-based holding power.
Toggle bolts feature spring-loaded wings that open behind the wall. This design supports medium loads up to 50 pounds. Molly bolts use a metal sleeve that expands when tightened.
They offer reliable support for items weighing up to 75 pounds. Self-drilling anchors can handle substantial weights up to 150 pounds. Always check the manufacturer’s weight ratings.
When to Use Plastic, Toggle, or Molly Bolts
Use plastic anchors for picture frames and small shelves. They are economical and widely available. Toggle bolts are ideal for medium-weight objects like mirrors.
Molly bolts work best for heavier items such as televisions. Consider the wall material when selecting your fastener. Each anchor type has specific installation requirements.
For maximum safety, stay below half the rated capacity. This provides a comfortable margin for valuable items. Multiple anchors distribute weight more effectively.
How to Apply Wall Anchors
Mastering the correct application technique provides confidence that your installations will withstand daily use. A systematic methodology ensures secure, long-lasting mounting when executed with proper attention to detail.
Successful fastener application begins with thorough preparation. Gather all necessary tools and materials before starting. Accurately measure and mark installation locations. Verify that selected fasteners match both wall type and weight requirements.
- Precise pilot hole drilling with correct bit size
- Careful fastener insertion into the wall
- Secure screw fastening with proper torque
- Comprehensive strength testing to verify integrity
Each fastener type presents unique characteristics. Plastic versions require gentle tapping into place. Toggle bolts need careful wing manipulation behind the surface. Molly bolts demand controlled expansion during tightening.
Professional techniques emphasize accuracy over speed. Rushing any step can compromise holding power or damage wall surfaces. Understanding the complete process before beginning prevents common mistakes.
This knowledge empowers homeowners to complete various mounting projects independently. You achieve professional-quality results while saving time and money.
Preparing Your Tools and Materials
Gathering the proper equipment before you begin is the first step toward a professional installation. Having everything organized prevents interruptions and ensures measurement accuracy.
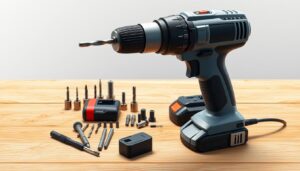
Essential Tools
Your toolkit should include several key items for successful fastener installation. The power drill serves as your primary tool for creating clean holes.
You will need both Phillips and flathead screwdriver types for different fasteners. A rubber mallet or standard hammer helps gently tap components into place.
Measuring tools like a level and tape measure ensure perfect alignment. Always keep a pencil handy for marking precise locations.
Choosing the Correct Drill Bit and Pilot Hole Size
Selecting the right drill bit is critical for proper fastener grip. The bit should be slightly smaller than your anchor’s diameter.
This creates the ideal pilot hole for maximum holding power. Most packaging indicates the correct drill bit size to use.
Commercial handyman Kevin Turner suggests an alternative method if you lack a drill. Carefully working a nail can create the necessary pilot opening.
Marking and Measuring the Installation Spot
The accuracy of your initial measurements directly impacts the final appearance and stability of your installation. Handyman Jason Phillip emphasizes that when using these fasteners, locating a wooden stud becomes optional for additional support.
Begin by determining the optimal height and horizontal position for your item. Consider room traffic patterns, furniture placement, and sight lines. This thoughtful planning ensures both functional and aesthetic success.
Use a pencil to mark exact locations with small dots or X marks. These visible indicators precisely identify drilling points while remaining easy to see during installation. This simple step prevents confusion when you return to the project.
When installing multiple fasteners for shelves or large frames, employ a level. This tool ensures all marks align horizontally or vertically. Proper alignment prevents crooked installations that appear unprofessional.
Tape measures provide precise spacing between anchor points. Verify dimensions match your item’s mounting hardware. For picture hanging, measure from the frame’s hanging hardware to determine vertical offset.
Double-check all measurements before drilling. This precaution prevents costly mistakes since filled holes leave visible patches. Repositioning fasteners after installation often requires wall repair work.
Drilling the Correct Pilot Hole
The quality of your pilot hole directly determines the holding strength of your wall anchor. This crucial step establishes the foundation for secure fastener installation.
Precision drilling requires careful attention to angle, depth control, and hole diameter. Different fastener types need specific hole sizes for optimal performance.
Tips for Drilling Accurately
Position your drill bit perfectly perpendicular to the wall surface. Any angle deviation creates oblong holes that reduce anchor grip. Maintain steady, consistent pressure while drilling.
Allow the bit to cut through material at its own pace. For drywall installations, drill only until the bit penetrates completely through the surface layers. Stop before traveling unnecessarily deep into the cavity.
Standard expansion anchors need holes slightly smaller than their diameter. Toggle bolts and molly bolts require larger openings for their folding mechanisms. Self-drilling versions eliminate the need for pre-drilled holes.
After creating each pilot hole, switch your drill to reverse mode before withdrawal. This clears debris and prevents gypsum dust from packing around the bit. Use masking tape wrapped around the drill bit as a depth guide for precision control.
Inserting the Anchor into the Wall
Successfully embedding the fastener requires understanding the unique characteristics of each anchor design. This phase bridges preparation with final installation, demanding careful attention to detail.
Each fastener type follows distinct insertion protocols. Plastic versions need gentle hand pressure or light tapping until the flange sits flush. Self-drilling models combine placement and installation in one motion.
Techniques for a Secure Fit
Toggle bolts present unique handling requirements. Thread the bolt through your item’s bracket first. Compress the spring-loaded wings and guide them through the opening.
Listen for the distinctive sound of wings expanding behind the surface. Molly bolts demand tapping the body into position until teeth grip the wall material. Then tighten the central screw to expand the anchor.
Achieving perfect flush contact with the surface is essential. Protruding fasteners create gaps, while over-inserted ones may compromise strength. If an anchor spins loosely, the pilot hole likely needs adjustment.
Remove problematic fasteners and fill the opening with spackling compound. After drying, drill a new pilot hole in a slightly different location. This ensures optimal holding power for your mounted items.
Securing the Anchor with a Screw
Proper screw installation represents the crucial last step in achieving a secure mount. This phase transforms your prepared anchor into a fully functional mounting point for heavy items.
Installation expert Peter Salerno advises caution with weight limits. “Comfortably, I would not hang something more than 75 pounds on half-inch drywall,” he states. He recommends using only half the rated capacity for extra safety.
Select screws that match your anchor specifications precisely. The diameter must fit snugly within the anchor opening. Length should accommodate your specific mounting application.
Insert the screw through your item’s mounting hardware first. This ensures proper alignment during installation. It eliminates the need to hold heavy objects in place while fastening.
Use a manual screwdriver for final tightening rather than a power drill. This provides better control and tactile feedback. You can feel when the screw reaches optimal tightness without exceeding safe limits.
Drive the screw clockwise with steady pressure until snug. The screw should feel firmly seated with slight resistance. Avoid excessive force that might strip threads or damage the anchor.
For expansion-type anchors, proper screw depth ensures maximum expansion against the wall material. Stop tightening if the anchor spins or resistance decreases. These signs indicate potential failure requiring reinstallation.
Additional Installation Tips and Tricks
Several key considerations can elevate your fastener installation from merely functional to exceptionally secure. Professional results come from attention to detail and understanding the finer points of the process.
Preventing Overtightening
Proper torque control is essential for maintaining anchor integrity. Excessive force can strip threads or damage the surrounding material. Listen for warning signs like cracking sounds or sudden resistance loss.
Always make sure you stop tightening when the screw feels snug. Visible deformation of the flange indicates you’ve gone too far. This tip preserves the holding strength of your installation.
Using Multiple Anchors for Heavy Items
For substantial items, distribute the weight across several fasteners. This approach shares the load and prevents individual points from failing. Proper spacing ensures balanced support.
When mounting heavy items, verify all pilot holes align perfectly. Misaligned points create stress concentrations. Multiple anchors provide redundancy for valuable possessions.
Inspect your drywall condition before beginning any project. Damaged or previously patched areas compromise holding strength. Quality surface material ensures reliable performance.
Consider combining hollow-wall fasteners with stud mounting for maximum security. This hybrid approach leverages the best of both methods. Always stay well below the rated capacity for safety margins.
Testing the Strength and Stability of Your Installation
Testing procedures serve as the critical validation step before trusting your installation with valuable possessions. This phase confirms that all previous work has been executed correctly.
Begin verification immediately after mounting while the object remains accessible. Apply gentle pressure in multiple directions to assess stability. The mounted piece should feel solidly connected without any movement.
For shelving units, add weight gradually in small increments. Monitor for warning signs during this process. Listen for creaking sounds and watch for visible movement.
Key indicators of potential problems include:
- Gaps appearing between the anchor flange and surface
- Screw backing out or loosening over time
- Downward sagging of the mounted object
- Cracking sounds or visible wall damage
If any instability appears, remove weight immediately. Assess whether the pilot hole was properly sized. Consider upgrading to a higher-capacity anchor type for better performance.
Professional installer Peter Salerno recommends using only half the rated capacity. This safety margin provides extra protection for your valuable items. Always make sure your testing confirms security before full loading.
Avoiding Common Mistakes
Even experienced DIY enthusiasts can encounter problems when fastener installation goes wrong. Awareness of typical errors helps maintain proper technique throughout the process. This prevents anchor failure, wall damage, and time-consuming repairs.
Proper preparation ensures your project proceeds smoothly from start to finish. Taking a moment to review these common pitfalls can save significant effort later.
Tips for Correct Drill Angle and Depth
The most frequent mistake involves drilling pilot holes at incorrect angles. Any deviation from perpendicular creates oblong holes that reduce anchor grip. This may allow fasteners to pull free under load.
Hold your drill bit perfectly straight against the surface. Maintain steady pressure to create clean, precise openings. Drilling too deeply creates oversized cavities behind the wall.
This prevents proper expansion of toggle bolts and molly bolts. Use tape wrapped around your bit as a depth guide for consistency.
Handling Damaged or Patchy Walls
Attempting installation in compromised areas significantly reduces holding power. Water-damaged sections or previously patched spots cannot provide adequate support. Always inspect your drywall condition before beginning.
If you accidentally create a hole that’s too large, patch it and try again. Moving to a different spot often provides better results. Using incorrect anchor sizes creates either inadequate support or installation difficulties.
Select fasteners that match both your weight requirements and wall thickness. This ensures optimal performance and security for your mounted items.
Final Thoughts and Next Steps
With the knowledge gained from this comprehensive guide, you’re now equipped to handle various mounting challenges around your home. The skills developed through understanding wall types and proper fastener selection will serve you well in countless improvement scenarios.
As you plan your next project, carefully assess requirements including wall composition and item weight. For shelves or picture hanging, choose appropriate drywall anchors based on load capacity. Different fastener types like toggle bolts or molly bolt options offer specific advantages.
Consider starting with lighter installations to build confidence before tackling heavy items. Keep a variety of anchor sizes in your toolkit for future needs. These versatile fasteners work beyond standard applications, providing reliable support for various surfaces.
When uncertain about any aspect of your installation, consult with hardware professionals. This knowledge represents a valuable long-term investment for maintaining and improving your living space effectively.