Welcome to your guide for upgrading your home with modern, automated illumination. This resource is designed for homeowners ready to tackle exciting projects. We focus on solutions that are both powerful and surprisingly affordable.
You no longer need a large budget or professional help to enjoy a smart home. Modern systems are user-friendly. Many basic upgrades can be completed in under fifteen minutes.
We will explore a wide range of options. These include simple dimmer switches and motion sensors. We will also cover more advanced, IoT-enabled smart lighting setups.
The benefits are significant. You gain improved energy efficiency and the ability to control your home’s atmosphere from your phone. This guide provides clear, step-by-step instructions to build your confidence, whether you are updating one room or your entire house.
Understanding DIY Smart Lighting and Its Benefits
The rise of Internet of Things (IoT) technology has revolutionized how we interact with everyday household items, including lights. These connected devices contain small processors and Wi-Fi modules. They communicate with cloud servers to execute commands from your phone or voice assistant.
What is DIY Smart Lighting?
This approach refers to self-installed systems that connect to your home network. They allow for remote control, automation, and integration with other smart home devices.
The range of available products is vast. You can find simple screw-in bulbs at major retailers. More comprehensive setups involve switches, dimmers, and motion sensors.
Advantages of Budget-Friendly Smart Home Solutions
The primary benefit is significant cost savings. You eliminate professional installation fees, which can be the largest part of the expense.
These systems offer incredible flexibility for creating the perfect ambiance. You have multiple options to adjust brightness and color in different rooms.
Taking a hands-on approach empowers you. You gain a full understanding of your system, making future changes or troubleshooting much easier. This is a great way to build a system gradually, room by room.
Modern lighting integrates seamlessly with voice assistants and automation routines. This provides a level of convenience that traditional setups cannot match.
Planning Your DIY Smart Lighting Project
A well-structured plan is the cornerstone of any successful home automation project. This phase saves time and money by ensuring you purchase the right products for your specific needs.
Careful planning helps you avoid common pitfalls. You will create a system that is both functional and aesthetically pleasing.
Assessing Your Home’s Lighting Needs
Begin your project with a walkthrough of your home. Identify key locations and areas where automated control would offer the most benefit.
Consider how you use each room. High-traffic areas like entryways need reliable control. Bedrooms often benefit from gentle wake-up routines.
Kitchens typically require bright, focused illumination for tasks. The same space might need softer lighting for evening ambiance.
Budgeting and Product Selection
Your budget should cover the core products, such as bulbs or switches. Also, account for any necessary hubs or specialized tools.
You have two primary options for your upgrade. Smart bulbs are simple to install but require the light switch to stay on. Smart switches control entire fixtures but need basic electrical work.
Research compatibility between your chosen products. For example, Lutron offers dimmers in 27 colors with over 250 lighting levels. Use their online tools to ensure your existing LED bulbs work perfectly with their dimmers.
Key considerations for your product selection include:
- Integration with your preferred control platform (e.g., Alexa, Google Home).
- The aesthetic match of switch plates and dimmers to your home’s decor.
- Starting with simpler locations to build confidence before tackling complex areas.
Essential Tools, Materials, and Technologies
Gathering the right gear is the first practical step toward a successful home upgrade. Having the correct components on hand streamlines the process and ensures safety.
This section breaks down the essential items you will need. We cover everything from basic hand tools to the core technologies that make automation possible.
Key Tools and Equipment Overview
A reliable set of tools is non-negotiable for most installations. Basic electrical work requires a few fundamental items.
Your toolkit should include a voltage tester for safety, wire strippers, and screwdrivers. Needle-nose pliers and electrical tape are also vital for secure connections.
For installing switches and dimmers, a drill with various bits is helpful. A countersink bit creates clean screw installations. A stud finder ensures you mount devices securely to wall studs.
For advanced projects, you might need soldering equipment or a mechanics tool set. Having these items ready prevents delays.
Highlighting LEDs, Sensors, and Smart Switches
The technology you choose defines your system’s capabilities. Modern products offer incredible flexibility and efficiency.
LED bulbs are the heart of any budget-friendly project. They provide excellent energy efficiency and long life. It is crucial to match them with compatible dimmers for optimal performance.
Motion sensors add hands-free convenience. They automatically activate lights when movement is detected. This is perfect for hallways, closets, and garages.
Smart switches control entire light fixtures from the wall. They are a cost-effective solution for rooms with multiple bulbs. These switches work with various bulb types, offering great flexibility.
Always verify compatibility between your chosen products. This ensures everything works together seamlessly.
DIY Smart Lighting Installation: Step-by-Step Guide
Executing the installation correctly is crucial for both safety and long-term performance. This guide breaks down the essential steps of the process.
We will cover critical electrical considerations first. Then, we will move into the hands-on installation process.
Wiring, Safety, and Electrical Considerations
Safety is the most important part of any electrical project. Always turn off power at the circuit breaker before you start.
Verify the power is off with a voltage tester. Never assume a switch is safe just because it is off.
Most modern switches need a neutral wire for operation. Check your existing wall box wiring before purchasing a new unit.
Following the manufacturer’s instructions precisely ensures a safe and functional installation. Tools like the Lutron Wiring Wizard offer customized guidance for your specific model.
- Connect the ground wire (copper or green) first.
- Next, connect the neutral wires (typically white), if required.
- Finally, connect the line (power in) and load (power to lights) wires.
Secure connections with wire nuts and carefully tuck wires into the box before mounting the switch.
Hands-On Installation Process Insights
The physical installation process is often quick. A basic switch upgrade can take just fifteen minutes.
Start by removing the old wall plate and switch. Take a photo of the wire connections for reference.
After wiring the new unit, mount it to the electrical box and attach the faceplate. Restore power and test the system thoroughly.
For custom lamp projects, the process involves construction, drilling holes for cables, and securing lights. Good cable management creates a clean, professional look.
Integrating IoT and Smart Home Features
The true potential of modern home illumination emerges when devices communicate seamlessly across platforms. This integration creates a cohesive system that responds intelligently to your lifestyle.
Leveraging Voice and App Control
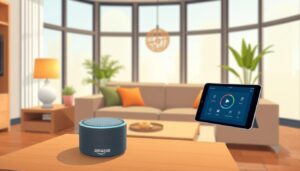
Voice commands represent one of the most convenient control methods available. Simply speaking to Alexa or Google Assistant lets you turn lights on or off instantly.
App-based management provides granular control from anywhere. You can adjust settings remotely, create schedules, and monitor energy usage through your smartphone.
Using Raspberry Pi for Advanced Control
Advanced users can build custom systems using Raspberry Pi devices connected to Google Cloud. This approach offers virtually unlimited customization possibilities for technical projects.
The system architecture involves Google Assistant triggering IFTTT, which calls a Cloud Function API. This sends configuration data to Google IoT Core for device execution.
Utilizing Motion Sensors and Smart Plugs
Motion sensors add hands-free automation to garages, closets, and hallways. They detect movement and automatically activate illumination when needed.
Smart plugs like the Iris WiFi model offer plug-and-play functionality for lamps. They work with Amazon Alexa without requiring additional hubs, making setup straightforward.
Proper device management ensures your system remains efficient as it expands. Labeling devices clearly and documenting your setup helps maintain organization over time.
Troubleshooting and Maintaining Your Smart Lighting System
Even the most carefully planned home automation project can encounter occasional hiccups. A proactive approach to maintenance ensures your setup remains reliable and efficient for years.
Understanding common problems and their solutions saves you time and frustration. This knowledge empowers you to keep everything working perfectly.
Common Issues and Quick Fixes
Connectivity problems are the most frequent issue. If your devices fail to respond, start with a simple power cycle.
Ensure your router is on a compatible 2.4GHz network. Also, verify the correct WiFi password was entered during setup.
Flickering lights often point to bulb and dimmer incompatibility. Consult manufacturer tools, like those from Lutron, to find recommended models.
If a new switch doesn’t work, double-check the wiring. Confirm line, load, and neutral connections are secure.
For custom Raspberry Pi setups, errors like “Unacceptable protocol version” mean device IDs must match your cloud configuration. Check all software dependencies and circuit connections.
Long-Term Maintenance Strategies
Regular maintenance prevents performance degradation over time. Update device firmware through manufacturer apps to gain new features and security patches.
Clean switches and sensors with a dry cloth several times a year. This prevents dust from affecting touch sensitivity and motion detection.
Replace batteries in wireless sensors and remotes every 6-12 months. Setting a calendar reminder is an easy way to stay on track.
Document your configuration and keep support contacts handy. This simplifies reconnecting devices after a network change, like a new router installation.
Final Thoughts and Next Steps for a Smarter Home
Your journey into creating a more responsive and efficient living space is now well underway. Successfully implementing your own automated system transforms daily life. You gain convenience, energy savings, and a customizable ambiance.
Starting with a simple project builds essential confidence. This knowledge empowers you to expand your system room by room. You can integrate more devices and explore advanced automation over time.
LED technology continues to advance rapidly. Newer bulbs offer better color, wider dimming, and longer life. They also work more seamlessly with various home systems.
Consider your next steps, like adding color-changing bulbs for entertainment areas. Outdoor installations enhance security and landscape appeal. Each project adds value and develops skills for other upgrades.
Remember, community forums and tutorials provide excellent support. The satisfaction of controlling your home from anywhere is a fantastic reward for your effort.