Upgrading your climate control system brings significant advantages to any household. This comprehensive guide helps homeowners install their new device efficiently. You can complete the entire process in about 20-30 minutes.
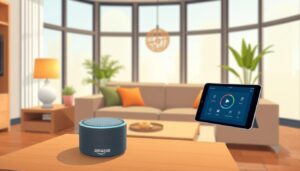
Modern climate control devices offer remarkable benefits for your home. They provide remote temperature adjustments and detailed energy usage analytics. Automated scheduling features help optimize your comfort while reducing utility costs.
The installation process involves several important stages. You’ll verify compatibility with your existing system first. Then you’ll safely remove old equipment and make proper wiring connections. Finally, you’ll configure the device through mobile applications.
This professional-level instruction empowers you to handle the project confidently. You’ll learn essential safety protocols and troubleshooting strategies. Following these steps saves both time and money compared to hiring an HVAC technician.
Smart Thermostat Setup: An Introduction
Advanced home climate devices bring sophisticated features to everyday temperature management. These innovative systems offer homeowners a modern approach to maintaining comfortable living spaces.
Overview of Smart Thermostat Benefits
Modern climate control units provide intelligent temperature regulation throughout your home. They learn your preferences and adjust heating and cooling cycles automatically.
Remote access through mobile applications gives you complete control from anywhere. You can modify settings before arriving home to ensure perfect comfort.
Why a DIY Installation Can Save You Time and Money
Professional installation services often charge around $200 for this type of work. Completing the project yourself eliminates this expense entirely.
The installation process typically takes only 20-30 minutes with basic tools. This efficient approach represents significant savings while providing immediate energy management benefits.
These devices help optimize your home’s climate control in a smart way. They contribute to reduced utility costs through intelligent air temperature management.
Preparing for Installation: Tools and Safety Precautions
Before beginning any electrical work, thorough preparation establishes the foundation for a smooth installation process. This crucial step ensures your safety and protects your home’s climate control equipment.
Turning Off Power and Ensuring Safety
The first critical step involves cutting electricity to your HVAC system. Locate the correct breakers in your electrical panel and switch them all off. Your heating and cooling equipment may have multiple circuits.
Verify the power is completely disconnected before proceeding. Adjust your current device’s temperature setting by at least 5 degrees. Wait approximately five minutes to confirm the system doesn’t activate.
This safety check accounts for built-in delays in many climate control systems. Working with live wires can damage components and create serious hazards.
Reviewing the Package and Accessory Checklist
Organize your workspace and examine all included components. Most manufacturers provide detailed checklists for their specific models. Make sure you have the display unit, base plate, and mounting hardware.
Typical packages contain screws, wire labels, trim plates, and installation guides. Having everything ready before starting saves significant time. Proper preparation minimizes errors during the installation process.
Keep your smartphone charged for app-based configuration. Ensure adequate lighting and have tools like a screwdriver accessible. These simple preparations contribute to professional results.
Assessing Home Compatibility and Wiring Requirements
Understanding your home’s electrical configuration is essential for thermostat compatibility. This assessment prevents installation issues and protects your equipment.
Using Compatibility Checklists and Tools
Manufacturers provide online tools to verify system compatibility. These checklists ask about your heating and cooling setup.
Answer questions about your current equipment accurately. This identifies potential problems before you begin installation.
Identifying Key Wiring Types and C-Wire Considerations
The common wire provides continuous power to your device. Some models require this connection for reliable operation.
Check for high voltage labels like 120V or 240V on your existing unit. These systems need specialized controls.
Multi-stage systems with variable airflow settings require specific compatibility. Verify your new device supports these configurations.
Step-by-Step Smart Thermostat Installation Process
This practical stage involves carefully replacing your existing temperature control unit with the upgraded model. Follow each step methodically to ensure proper function and avoid errors.
Removing the Old Thermostat and Documenting Wiring
Begin by removing the faceplate from your current device. Gently pull it off or remove small screws if visible. Take clear photos of the wiring configuration before disconnecting anything.
Document each wire’s terminal connection using labels from your kit. The terminal designations matter more than wire colors. Remove any jumper wires connecting two terminals.
Disconnect all wires and wrap them around a pencil. This prevents them from falling into the wall cavity. Unscrew and remove the old mounting plate completely.
Wiring, Labeling, and Custom Diagram Setup
Thread all labeled wires through the center of your new base plate. Use the adhesive labels provided to mark each wire according to its original terminal.
Connect wires to the corresponding terminals on the new base. Press the connector button, insert the wire fully, then release. The button should stay down to confirm secure connection.
Never connect multiple wires to one terminal. Avoid using spare wires not connected to your old device. Gently push excess wire length back toward the wall.
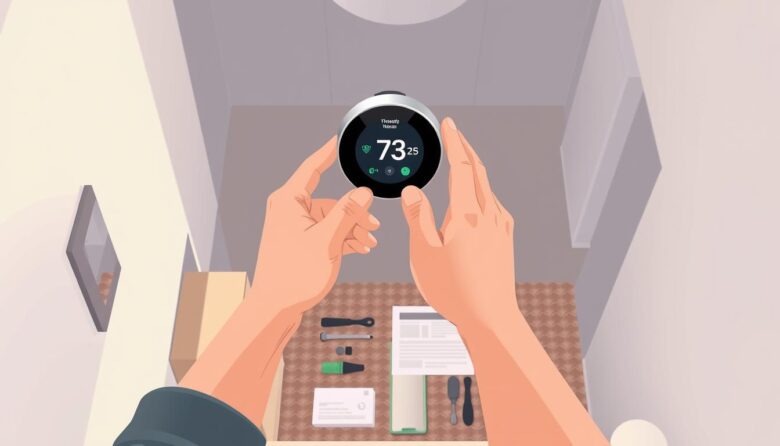
Mounting the New Thermostat Base Securely
Position the base plate at four to six feet height on the wall. Use the integrated bubble level to ensure perfect alignment. Mark screw hole locations with a pencil.
For drywall, use a screwdriver to install self-tapping screws. Avoid power drills that can crack the base. For harder materials, pre-drill pilot holes first.
Always check for hidden pipes or wiring before drilling. The entire mounting process typically takes about twenty minutes when done carefully.
Connecting to Wi-Fi and Configuring Your Smart App
Your newly installed climate control device becomes truly intelligent when connected to your home network. This digital pairing unlocks remote management and advanced features through the manufacturer’s dedicated application.
Pairing the Thermostat with Your Wi-Fi Network
Begin by downloading the latest companion app from the Apple App Store or Google Play. Open the application and navigate to the settings menu to add your new device.
The setup process typically involves scanning a QR code on the unit’s back. Alternatively, you can manually select your model from a list. Your device will then search for available Wi-Fi networks.
Enter your network password when prompted. This connection enables remote control from anywhere and ensures automatic software updates.
Optimizing App Settings for Energy Efficiency
After connecting, the app guides you through important configuration questions. Provide details about your home’s characteristics and HVAC system specifications.
Establish customized temperature schedules for different times of day. Programs for wake, away, and sleep periods help maximize energy savings.
Explore advanced features like geofencing and learning modes. These functions adapt to your patterns for optimal comfort and efficiency.
Consider adding compatible temperature sensors to other rooms. This provides more accurate air temperature readings throughout your living space.
Troubleshooting and Fine-Tuning Your Setup
Even with careful preparation, some installations may require troubleshooting to achieve optimal performance. This final phase ensures your climate control device operates correctly and efficiently.
Addressing Common Installation Challenges
After you turn the power back on, your device should activate automatically. If the display remains dark, look for a blinking red light indicating battery charging.
Check that all wires connect securely in their terminals. If buttons don’t stay depressed, remove the wire, straighten it, and reinsert firmly.
Excess wire length can prevent proper display connection. Push protruding wires back into the wall cavity.
When to Contact a Professional HVAC Technician
Complex multi-stage systems or missing C-wires often require professional assistance. Persistent operational problems despite correct installation also warrant expert help.
Professional services handle the entire process from assessment through configuration. They provide demonstrations and extended warranties.
Note that attempting complex repairs may void your warranty. Contact manufacturer support for persistent issues.
Final Thoughts: Completing Your Smart Thermostat Installation
Completing this technical upgrade marks a new chapter in home efficiency. You have gained advanced climate control and valuable DIY skills. The entire process typically takes about thirty minutes with careful attention.
Your new device offers immediate benefits like remote temperature adjustment and automated scheduling. These features help optimize your heating and cooling patterns for comfort and savings. Thoughtful app configuration unlocks the full potential of your system.
This comprehensive guide has equipped you with knowledge from compatibility checks to final wiring. The skills you practiced—like safe electrical work and secure mounting—apply to future projects. Your investment in time now pays back in control and reduced energy costs.