Mastering the process of swapping equipment in power tools ensures smoother projects and extends tool longevity. Whether you’re hanging shelves or crafting furniture, proper technique prevents stripped screws, damaged materials, and unnecessary frustration. This skill is equally vital for weekend DIYers and seasoned contractors.
Many hesitate when dealing with rotational force or unfamiliar chuck designs. Understanding torque settings and chuck mechanisms eliminates guesswork. Keyless chucks require a simple twist, while keyed versions demand precise alignment. Always ensure the tool is unplugged or the battery is removed before adjustments.
Forcing components risks permanent damage to both the accessory and your equipment. Gentle pressure and proper grip make transitions effortless. Confidently handling these tasks opens doors to diverse applications, from woodworking to metal fabrication.
This guide simplifies the fundamentals with actionable advice tailored to all experience levels. Follow these methods to maintain precision and safety in every project. Let’s explore the straightforward approach to keeping your workflow efficient and your tools in top shape.
Understanding Your Drill and Its Key Components
To maximize your tool’s potential, start by learning its core elements. The chuck mechanism plays a vital role in securing accessories, while specialized jaws or collets ensure precise grip. Knowing these parts helps avoid errors and improves project outcomes.
Identifying the Chuck, Jaws, and Collet
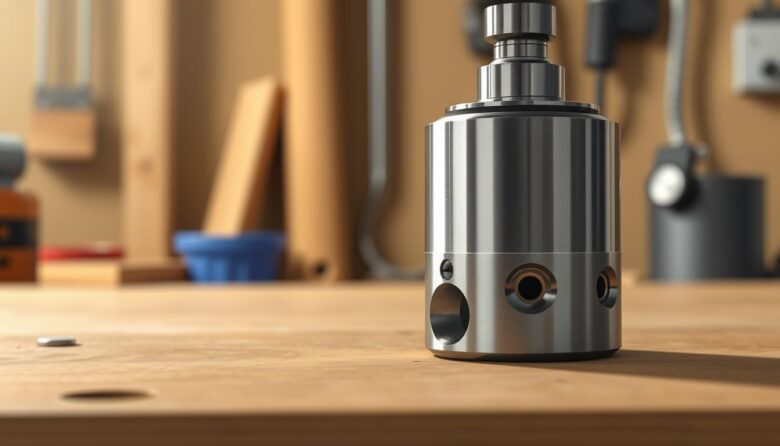
The chuck is the rotating collar at the front of your tool. Inside it, three adjustable jaws clamp down on accessories when tightened. Key features:
- Keyed chucks require a separate key for adjustments
- Keyless versions operate with hand-tightening
- Collet systems provide ultra-secure holds for specialized bits
Recognizing Different Bit Types and Their Uses
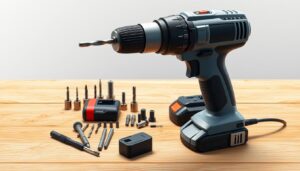
Selecting the right accessory depends on material and task requirements. Common options include:
- Brad point: Clean wood boring
- Masonry: Concrete or brick penetration
- Twist: Versatile metal/plastic drilling
Titanium-coated options last longer than standard steel, while carbide-tipped varieties handle extreme hardness. Match the accessory’s design to your project for optimal results.
Safety Precautions When Changing a Drill Bit
Prioritizing safety measures protects both users and equipment during tool maintenance. A single oversight could lead to severe injuries or costly repairs. These protocols apply to cordless and corded models alike.
Power Isolation and Protective Equipment
Always disconnect energy sources before servicing your equipment. Remove batteries from cordless tools or unplug wired models entirely. This prevents accidental activation that could cause finger injuries or sudden rotations.
Wear ANSI-approved safety glasses to shield eyes from metal fragments. Heavy-duty gloves safeguard hands during accessory swaps, especially when handling sharp edges. Secure long hair and avoid jewelry that might snag on moving parts.
Safe Operational Practices
Inspect accessories for cracks or deformities before installation. Damaged components can shatter under stress, creating projectile hazards. Maintain firm control when tightening chucks, keeping fingers clear of pinch points.
Organize your workspace to minimize tripping risks. Keep emergency kits accessible and understand basic wound care procedures. Proper lighting ensures clear visibility of small components during adjustments.
Essential Tools and Drill Bit Options
Tool efficiency hinges on selecting compatible components tailored to your workflow. Modern advancements offer diverse chuck systems and specialized accessories, each suited to distinct project demands.
Keyless vs. Keyed Chucks
Keyless chucks dominate modern power tools, allowing rapid swaps with hand-tightened rotation. Their design eliminates reliance on external tools, ideal for tasks requiring frequent adjustments. Cordless models particularly benefit from this streamlined approach.
Keyed chucks demand a dedicated L-shaped wrench for operation. Though less common today, they excel in high-torque scenarios where maximum grip matters. Professionals working with dense materials often prefer this secure fastening method despite the inconvenience of potential key misplacement.
Selecting the Right Bit for Your Project
Material compatibility dictates accessory choices. Consider these primary options:
- Woodworking: Brad-point tips prevent splintering
- Masonry: Carbide edges handle concrete surfaces
- Metalwork: Titanium coatings reduce heat buildup
Match shank sizes to your chuck’s capacity for seamless integration. Specialty accessories like spade bits or hole saws expand functionality but require proper torque settings. Always verify manufacturer specifications before engagement.
Step-by-Step Guide for Changing a Drill Bit
Executing proper accessory swaps boosts efficiency and reduces tool wear. Follow these methods to maintain precision and safety during transitions between tasks. Clear processes prevent component damage and ensure consistent performance.
Loosening the Chuck and Removing the Old Bit
Grip the chuck firmly with your non-dominant hand. Rotate the front section clockwise until the jaws fully open. For keyless models, apply steady pressure while twisting – excessive force risks stripping the mechanism.
Keyed systems require inserting the L-shaped tool into side holes. Turn counter-clockwise in 1/4 rotations until the accessory releases smoothly. Never yank stuck components – gently wiggle while maintaining rotational pressure.
Inserting the New Bit and Securing It Properly
Position the smooth shank between open jaws, ensuring cutting edges face outward. Hold the accessory midway for optimal control during placement. Tighten counter-clockwise until resistance increases significantly.
- Keyless chucks: Hand-tighten until no wobble remains
- Keyed systems: Use the wrench for three full rotations
Test security by pulling firmly on the installed accessory. Proper seating eliminates slippage during high-torque operations. Confirm alignment through visual checks before activating the tool.
Mastering Advanced Techniques and Overcoming Common Challenges
Elevating your skills requires tackling complex scenarios that test equipment limits. These solutions address stubborn components and specialized tools, helping you maintain momentum during demanding projects.
Using a Chuck Key for Older or Keyed Drills
Align the key’s teeth with the chuck’s internal grooves for secure engagement. Insert the tool until it clicks into place, then rotate counter-clockwise to release tension. Always store the key in designated tool slots to prevent loss during critical tasks.
Troubleshooting Jammed Chucks and Bit Misalignments
Apply controlled taps to the chuck sleeve with a rubber mallet to break corrosion bonds. If resistance persists, grip the outer collar and activate reverse rotation at low speed. Penetrating oils dissolve rust when left overnight, while strap wrenches provide extra torque for stubborn cases.
Tips for Handling Impact Drivers and Quick-Release Systems
Spring-loaded chucks demand firm pressure on the collar while pulling accessories straight out. Ball bearings lock accessories in place – listen for audible clicks confirming proper seating. Clean detent mechanisms regularly to prevent dirt buildup affecting release smoothness.
For emergency situations without original keys, needle-nose pliers can manually rotate chuck gears in quarter-turn increments. Always prioritize manufacturer guidelines when improvising solutions to avoid voiding warranties.
Maintenance Tips for Longevity and Optimal Performance
Proper care extends the lifespan of your equipment and ensures consistent results. Implementing smart routines protects your investment while maintaining precision across projects. These strategies apply to both hobbyist workshops and professional job sites.
Cleaning, Inspecting, and Storing Your Drill Bits
Wipe accessories with a dry cloth after each use to remove debris. Check cutting edges for chips or dullness – damaged bits require immediate replacement. Store them vertically in labeled cases to prevent contact between metal surfaces.
Monthly deep cleaning removes stubborn residue. Soak drill bits in mineral spirits for 10 minutes, then scrub with a brass brush. Dry thoroughly before returning to storage to avoid rust formation.
Regular Tool Maintenance to Prevent Wear and Damage
Lubricate the chuck mechanism quarterly using silicone spray. This prevents grit buildup and ensures smooth operation. Test rotation resistance monthly – sticky movement indicates needed servicing.
Inspect power cables and battery contacts for wear. Replace cracked housings immediately to prevent electrical hazards. Allow heated tools to cool completely before storage to protect internal components.
Create a maintenance schedule tracking these tasks:
- Weekly visual inspections
- Monthly lubrication cycles
- Annual professional tune-ups
Final Thoughts on Safely Changing a Drill Bit
Efficient tool operation begins with proper accessory management. Swapping components might seem simple, but precision matters for safety and performance. Universal principles apply – loosen the chuck, remove old accessories, and secure replacements firmly.
Always consult manufacturer guidelines for model-specific details. Variations exist between brands, but core techniques remain consistent. This approach maintains equipment reliability while preventing stripped screws or damaged materials.
Mastering these skills transforms users from hesitant beginners to confident operators. Regular practice builds instinctive familiarity with different chuck systems and bit types. Whether creating pilot holes or finishing projects, proper execution ensures clean results every time.
Prioritize routine maintenance checks and immediate repairs for worn components. Store accessories in organized cases to prevent edge damage. Combine these habits with focused attention on safety protocols to protect both users and tools.
Success hinges on respecting the process while adapting to unique challenges. With patience and practice, even complex swaps become quick, effortless tasks that elevate your craftsmanship.


