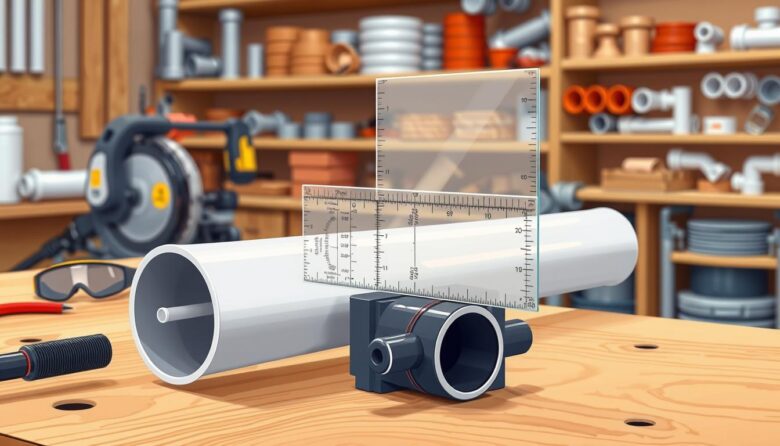
Polyvinyl chloride (PVC) is one of the most versatile materials in modern construction. Known for its durability and adaptability, this synthetic polymer plays a vital role in plumbing, irrigation, and electrical systems. Whether you’re tackling a DIY repair or upgrading your home’s infrastructure, understanding how to handle these materials correctly ensures long-lasting results.
Working with rigid plastics requires precision and the right approach. Improper techniques can lead to uneven edges, material waste, or even potential safety risks. This guide focuses on professional methods that balance efficiency with accuracy, helping you achieve clean finishes every time.
Homeowners and hobbyists will learn to choose tools based on project scope and skill level. From basic hand saws to specialized equipment, each option has distinct advantages. By mastering foundational skills, you’ll avoid common pitfalls and build confidence for more complex tasks.
Safety remains a top priority throughout any project. Protective gear, workspace preparation, and material-specific strategies reduce hazards while improving outcomes. Let’s explore the essentials for working with these durable yet manageable building components.
Understanding PVC and Plastic: Materials and Their Uses
From plumbing to electrical systems, this synthetic polymer has become a cornerstone of durable infrastructure. Its unique blend of heat resistance and chemical stability makes it ideal for projects requiring long-term reliability. Whether shaping custom fittings or installing main supply lines, the material’s properties often outperform traditional alternatives.
What Is PVC?
Polyvinyl chloride (PVC) is a thermoplastic prized for its robust molecular structure. Unlike metal, it withstands corrosion from moisture and acidic substances effortlessly. This resilience allows it to maintain integrity in high-pressure environments, which is why it dominates fluid transport applications.
Common Applications in Construction and Home Projects
Water distribution networks rely heavily on these components due to their smooth interior walls. Reduced friction ensures efficient flow in supply lines and drainage systems. Lightweight designs simplify installation, while flexible joints accommodate complex layouts without compromising durability.
Homeowners frequently use them for irrigation setups and waste management solutions. Their cost-effectiveness and minimal upkeep needs make them a practical choice for both temporary fixes and permanent installations. With proper selection, they deliver decades of trouble-free performance in demanding conditions.
The Role of PVC in Home DIY Projects
DIY enthusiasts across the U.S. are embracing a durable material that revolutionizes home improvements. Its adaptability and ease of modification make it ideal for creative solutions requiring minimal tools or expertise. From quick fixes to custom builds, this polymer delivers results that balance functionality with affordability.
Lightweight construction allows single users to maneuver long sections effortlessly. This eliminates the need for heavy machinery or extra hands during assembly. Budget-friendly pricing further enhances its appeal, letting homeowners tackle upgrades without contractor fees.
Common applications include:
- Custom shelving and storage racks for garages
- Drip irrigation systems for gardens
- Outdoor furniture frames resistant to weather damage
- Creative play structures for kids
Mistakes are easily corrected since modifications require basic tools. Unlike rigid alternatives, adjustments rarely waste materials. Beginners appreciate the low learning curve, while seasoned crafters value its consistent performance in multi-phase projects.
Basic Safety Measures for Cutting Plastic and PVC
Proper safety protocols elevate project outcomes while minimizing risks. Before handling tools, assess your workspace and equipment to create a controlled environment. This approach reduces errors and ensures materials remain stable during modifications.
Essential Personal Protective Equipment
Eye protection is non-negotiable. High-impact glasses shield against flying fragments when scoring or trimming materials. For extended tasks, consider goggles with side shields for complete coverage.
Durable gloves improve grip and prevent abrasions from rough edges. Choose snug-fitting options that allow precise tool control without restricting movement. Pair them with long sleeves to protect arms from debris.
Organize your area with adequate lighting and clutter-free surfaces. Secure workpieces using clamps or vises to maintain stability. Always double-check tool conditions before starting—dull blades or loose components increase accident risks.
Essential Tools and Equipment for Cutting PVC
Selecting the right equipment transforms how you handle plastic materials in home projects. Proper tools streamline workflows while ensuring clean, precise results tailored to your needs. Let’s explore manual and electric options that cater to different skill levels and project scales.
Manual Cutting Tools: Hacksaws and Plastic Pipe Cutters
Plastic pipe cutters excel in simplicity, using sharp blades to slice through materials without generating debris. Their scissor-like design suits tight spaces and delivers smooth edges. For smaller diameters, these cutters require minimal effort, though thicker sections demand firm hand pressure.
Hacksaws remain a budget-friendly choice for occasional use. Fine-toothed blades reduce splintering, but achieving straight lines requires steady guidance. Pairing them with miter boxes improves accuracy for angled cuts in confined areas.
Electric Tools: Miter Saws and Specialized Blades
Miter saws dominate high-volume tasks with rapid, repeatable performance. Carbide-tipped blades maintain sharpness longer, reducing friction and melting risks. Always secure workpieces firmly before activating these powerhouses to prevent kickback.
Specialized blades with triple-chip grinds minimize chipping on brittle materials. Adjustable speed settings allow customization based on thickness, while laser guides enhance alignment precision. Remember to wear hearing protection during extended use.
Step-by-Step Guide on cutting PVC pipe safely
Mastering clean modifications for rigid materials starts with a methodical process. Follow these steps to achieve precise results while maintaining control over your workspace.
- Secure the Material
Clamp pipe sections firmly in a vise, positioning it 3–4 inches from your planned cut line. This prevents rotation or slippage during the procedure. - Mark Your Target Area
Use a permanent marker to draw a visible line where you want cut. Rotate the piece to ensure full circumferential visibility for alignment. - Initiate the Cut
Position your saw blade perpendicular to the surface. Apply light pressure to create a groove, then increase force while tracking the marked guide. - Maintain Steady Motion
Avoid rushing—let the tool do the work. Pause periodically to check progress and adjust your grip if needed. - Refine the Edges
Remove burrs with 120-grit sandpaper. Test-fit connectors to confirm smooth transitions before final installation.
Proper clamping reduces vibration, which is critical for straight lines. Clear markings eliminate guesswork, especially when working with glossy surfaces that reflect light.
Post-cut finishing ensures leak-proof connections. Spending 2–3 minutes smoothing edges can prevent hours of troubleshooting later. Always inspect fittings for debris before assembly.
Recommended Techniques: Manual vs. Electric Cutting Methods
Optimal results in material modification come from understanding when to use hand tools versus electric alternatives. Each approach offers distinct benefits tailored to specific project needs and user skill levels.
Manual Methods: Techniques and Tips for Accuracy
Rotating pipe cutters work best for diameters under 1 inch. Their circular blades create uniform grooves through steady rotation. This method minimizes material stress while producing smooth edges.
Larger projects benefit from ratcheting tools. These devices use incremental pressure to slice through thicker sections. Maintain consistent force to avoid jagged edges and ensure clean separation.
Electric Methods: Efficiency and Safety Considerations
Miter saws accelerate repetitive tasks with precision. Use carbide-tipped blades designed for synthetic materials to prevent melting. Secure workpieces with clamps before activating the tool.
Adjust speed settings based on material thickness. Always wear hearing protection and check blade alignment. Electric tools demand respect—never force the saw through the material. Let the blade’s teeth do the work through controlled motion.
Consider these factors when choosing your method:
- Project size and timeline
- Available workspace conditions
- Required edge quality
- Personal comfort with power tools
Tips and Tricks for Achieving Accurate and Clean Cuts
Clean, accurate cuts are the hallmark of a well-executed project. Professionals rely on simple yet effective strategies to maintain precision while reducing effort. These methods work equally well for hobbyists tackling weekend upgrades.
Lubrication minimizes friction during slicing. A light spray of silicone or vegetable oil on blades helps them glide smoothly. This prevents flaking and extends tool lifespan while ensuring edges stay neat.
Control debris by stuffing cotton rags into open ends before starting. Lay newspapers under your workspace to catch fragments. This keeps interiors clean and speeds up post-project cleanup.
Choosing the right blade makes a big difference. Fine-tooth options (18-24 TPI) create smoother finishes than coarse alternatives. For power tools, select blades labeled for plastic to avoid melting or chipping.
Always refine edges after separation. Use 120-grit sandpaper to remove burrs, rotating the piece as you work. This step ensures connectors fit snugly and systems function properly long-term.
The best way to cut well involves preparation and patience. Test these techniques on scrap pieces first to build confidence. With practice, you’ll achieve commercial-grade results without specialized training.
Troubleshooting and Maintenance for Your Cutting Tools
Keeping your equipment in top shape ensures reliable performance across multiple projects. Regular care prevents unexpected breakdowns and maintains precision. Let’s explore solutions for common challenges and strategies to extend tool lifespan.
Common Problems and How to Solve Them
Blade wear ranks as the top issue affecting accuracy. Dull edges create rough finishes and require extra force. Replace or sharpen them when cuts become inconsistent.
Cold weather makes materials brittle, leading to cracks. Warm tools briefly with a hairdryer before use. For power tools, reduce speed settings to prevent overheating during operation.
- Binding issues: Clean debris from moving parts
- Misaligned cuts: Check blade tension and alignment
- Excessive vibration: Tighten loose components
Tool Maintenance and Safety Checks
Inspect blades weekly for chips or warping. Store equipment in dry areas to prevent rust. Follow these steps monthly:
- Lubricate pivot points on cutters
- Test safety guards on power tools
- Verify blade sharpness with scrap material
Always reference manufacturer guidelines for specific models. Proper care reduces replacement costs and keeps your workspace accident-free.
Final Insights on Mastering Your PVC Cutting Projects
Developing proficiency in modifying durable materials opens doors to countless home upgrades. Choosing the right tools for each task—whether manual ratchet cutters for small jobs or miter saws for bulk work—ensures precision and efficiency. Always review manufacturer guidelines to match blade types with material thickness and project demands.
Quality equipment paired with proper technique delivers leak-free connections and professional finishes. Beginners should start with simple repairs to build confidence before tackling complex installations. These foundational skills often translate to other DIY areas, fostering self-reliance and creative problem-solving.
Investing time in learning best practices pays off through long-term cost savings and reduced reliance on contractors. While initial attempts may require patience, the satisfaction of achieving flawless results makes the effort worthwhile. Each successful project builds expertise that empowers homeowners to handle increasingly ambitious tasks.
Remember: accurate measurements and methodical preparation prevent wasted materials. Store tools properly and perform regular maintenance to extend their lifespan. With practice, even intricate modifications become manageable, turning everyday challenges into opportunities for growth.


