Creating clean, damage-free openings in walls demands more than just power tools. Precision and preparation form the foundation of professional results, whether you’re mounting shelves or installing fixtures. Modern equipment combines versatility with controlled performance, but success hinges on understanding your materials and methods.
Choosing the right tool matters. Corded models deliver consistent power for dense surfaces like brick, while cordless units provide flexibility for quick tasks. Bits designed for specific materials—wood, metal, or masonry—prevent slippage and reduce stress on walls. Variable speed settings help maintain control during operation.
Safety extends beyond personal protection. Proper technique preserves structural integrity and prevents costly repairs. Start with a pilot hole, apply steady pressure, and let the tool do the work. Rushing increases risks of fractures or bit damage.
This guide details a systematic approach to wall preparation, equipment selection, and execution. You’ll learn to assess surfaces, match bits to materials, and maintain optimal drilling angles. Master these principles to achieve clean results while protecting your workspace and yourself.
Understanding Your Drill and Essential Tools
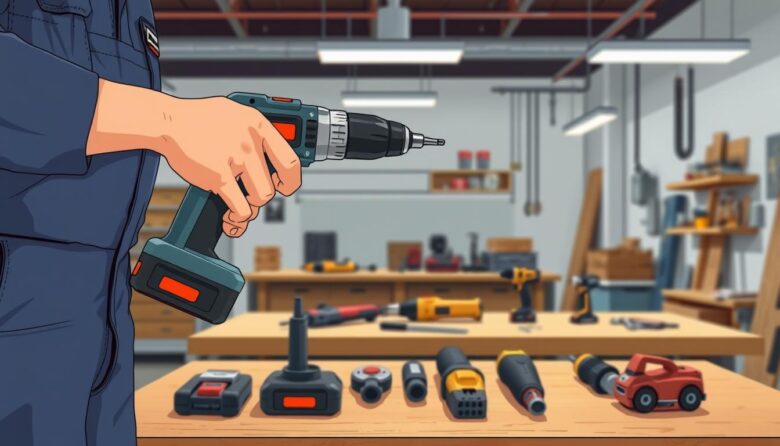
Every successful project starts with knowing your equipment inside and out. Modern drills transform from hole-makers to multi-functional assets, handling everything from surface polishing to mixing compounds. Versatility defines these tools, with corded models excelling in heavy-duty tasks and cordless units offering unmatched mobility.
Introduction to Drills and Their Versatility
Corded drills deliver relentless power for concrete or thick metal, while cordless versions navigate tight spaces effortlessly. Variable speed triggers adapt to materials—low settings prevent ceramic tile cracks, high RPMs power through softwood. Torque controls prevent overdriving screws, making these tools equally effective for assembly work.
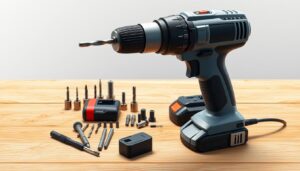
Overview of Common Drill Bits and Their Uses
Bit selection determines project outcomes. Twist bits handle everyday metal and plastic jobs. For woodworking:
- Spade bits create large openings
- Forstner bits craft flat-bottomed holes
- Hole saws remove perfect material circles
Carbide-tipped options conquer masonry, while titanium-coated bits reduce friction in steel. Always match bit specifications to your material hardness and hole depth requirements.
Selecting the Right Drill Bit for Your Project
Choosing the correct bit transforms drilling from guesswork to exact science. Measure twice, cut once applies to hole preparation—exact dimensions prevent structural stress and material waste. Always match bit specifications to fastener requirements and surface density.
Determining the Size and Depth for a Clean Hole
Pilot holes prove essential for wood projects. Use a bit diameter matching the screw’s core (excluding threads) to prevent splitting. Depth markers on bits or tape flags ensure consistent penetration without over-drilling.
For large openings, start with a 1/8-inch bit. Gradually increase sizes in 1/8-inch increments. This staged approach maintains control, reduces heat buildup, and delivers cleaner edges.
Choosing Specialty Bits: Twist, Spade, Forstner, and Hole Saw Options
Twist bits handle 90% of basic tasks in wood and metal. Spade bits remove material rapidly for plumbing lines or cable runs. Their flat design requires firm pressure to prevent wandering.
Forstner bits excel in precision woodworking. Create flat-bottomed holes for hidden hinges or decorative inlays. Their rim-guided design allows angled entries impossible with standard bits.
Hole saws tackle diameters exceeding 2 inches. Ideal for installing doorknobs or piping, these cylindrical bits require steady RPMs. Always use a center pilot bit for alignment stability.
Preparing Your Drill for Optimal Performance
Proper equipment setup separates amateur attempts from professional outcomes. Chuck alignment and power configuration directly influence precision and surface protection. Follow these protocols to transform your tool into a controlled, reliable asset.
Securing the Bit in the Chuck Correctly
Rotate the chuck counterclockwise until jaws open wide enough for the bit’s shank. Insert only the smooth section—never the fluted cutting edges. Tighten by twisting clockwise until resistance increases.
Verify centering by spinning the chuck manually. Jaws must grip flat shank surfaces evenly. Misaligned bits wobble during operation, increasing fracture risks in brittle materials.
Adjusting Speed, Torque, and Other Settings
Match configurations to your task. Use Setting 1 (low speed/high torque) for screws and dense surfaces. Switch to Setting 2 for rapid material removal in wood or drywall.
Set the torque dial to the drill icon or maximum value when boring holes. This bypasses clutch mechanisms, delivering full rotational force. Always check battery levels—diminished power causes inconsistent RPMs and incomplete penetration.
Test settings on scrap material first. Adjust until the tool maintains steady progress without binding. Proper preparation prevents rushed corrections mid-project.
Mastering How to Drill Safely in Different Materials
Material recognition forms the cornerstone of effective drilling. Walls hide complex layers and utilities requiring careful analysis before starting any project. Use a stud finder with wire detection modes to map hidden obstacles behind surfaces.
Identifying Material Types: Drywall, Wood, Metal, and Concrete
Test surfaces with a small pilot hole when uncertain. Drywall crumbles easily—use low-speed settings and sharp twist bits. Solid wood demands spade bits with aggressive teeth. For metal surfaces, start with cobalt bits and cutting fluid to reduce heat.
Concrete requires carbide-tipped masonry bits and hammer drill functions. Lath and plaster walls need special care—blunt bits prevent shredding the fragile material. Always confirm depth requirements to avoid penetrating exterior layers.
Techniques for Avoiding Damage and Hidden Hazards
Assume every wall contains unexpected pipes or wires. Vertical drilling zones near outlets often hide electrical lines. Horizontal paths between fixtures frequently conceal plumbing. Use non-conductive bits when working near suspected wiring.
Blunt drill bits serve as exploratory tools in high-risk areas. They create shallow indentations without severing cables or fracturing pipes. For concrete foundations, mark rebar locations with a metal detector before drilling.
Make sure to review utility blueprints when available. If unavailable, maintain 1.5-inch clearance from edges where builders typically route infrastructure. This systematic approach reduces repair costs and ensures project success.
Executing the Drilling Process Step-by-Step
Precision in drilling hinges on methodical execution from start to finish. Proper alignment and controlled operation eliminate guesswork, ensuring clean results without surface damage. Follow these protocols to maintain structural integrity while achieving exact specifications.
Aligning the Drill Bit Perpendicularly for Clean Cuts
Position the bit tip firmly against the surface before activating the tool. Maintain a 90-degree angle using these techniques:
- Use a bubble level attached to the drill body
- Check alignment from multiple sightlines
- Engage clutch-assisted models for angle retention
Start drilling at 500 RPM to establish initial penetration. Increase speed incrementally once the bit achieves 1/8-inch depth. This prevents skidding on smooth surfaces like tile or metal.
Managing Pressure and Speed for Consistency
Apply downward force equivalent to 5-8 pounds for standard materials. Let the bit’s cutting edges perform the work—excessive pressure causes overheating and material fractures. Monitor these indicators:
- Consistent chip formation indicates proper feed rate
- Smoke signals excessive friction—reduce speed immediately
- High-pitched whining suggests dull bits needing replacement
Withdraw the rotating drill slowly after breakthrough. Reverse rotation risks chipping hole edges. Test fastener fit—if resistance occurs, widen the hole using circular motions with the original bit.
Prioritizing Safety: Gear, Workspace, and Best Practices
Effective drilling projects demand more than technical skill—they require unwavering commitment to safety protocols. Protective measures shield operators from immediate dangers while preserving long-term health. Let’s examine the three pillars of worksite security.
Essential Safety Gear: Goggles, Gloves, and Dust Masks
Impact-resistant goggles with side shields prevent 90% of eye injuries from flying debris. Pair them with N95 respirators when working on concrete or pressure-treated wood to filter toxic dust particles. Cut-resistant gloves maintain dexterity while shielding hands from sharp edges and heat buildup.
A carpenter learned this lesson painfully when a wood splinter pierced his cornea during routine drilling—an injury preventable with $10 safety glasses. This underscores why proper PPE isn’t optional.
Creating a Secure Workspace with Clamps and Proper Lighting
Organize your area using these strategies:
- Secure materials with quick-release clamps to prevent shifting
- Position task lights to eliminate shadows near drill points
- Coil excess cords to avoid tripping hazards
Bright illumination reduces errors by 40% according to OSHA studies. Stable workpieces ensure precise bit alignment, while clear floors prevent accidental tool activation.
Handling Common Drilling Hazards and Electrical Risks
Inspect tools for frayed wires before each use—faulty equipment caused 12% of workshop electrocutions last year. Keep all components dry; water conducts electricity through metal bits into hands. When drilling near outlets:
- Turn off circuit breakers
- Use voltage testers
- Select insulated tools
Teams should conduct daily safety audits and refresh training quarterly. These practices transform reactive problem-solving into proactive risk management.
Final Thoughts on Drilling Without Cracking Your Wall
Flawless wall drilling combines knowledge with disciplined practice. Selecting the right tools remains critical—match bit types to materials and verify drill settings before starting. Always check both sides of walls for hidden utilities using detection tools.
Preparation separates success from frustration. Make sure surfaces are clean and marked precisely. Use painter’s tape on tile or glass to prevent slippage during initial contact. These small things protect surfaces while ensuring hole placement accuracy.
Technique matters as much as equipment. Maintain steady pressure and let sharp bits do the work. For challenging materials like aged plaster, start with pilot holes and gradually widen them. Review video tutorials for complex projects involving multiple material layers.
Every project reinforces this truth: precision execution prevents cracks. Invest time in planning, respect your tools, and prioritize structural integrity. With practice, creating clean holes becomes a repeatable part of home improvement work.


