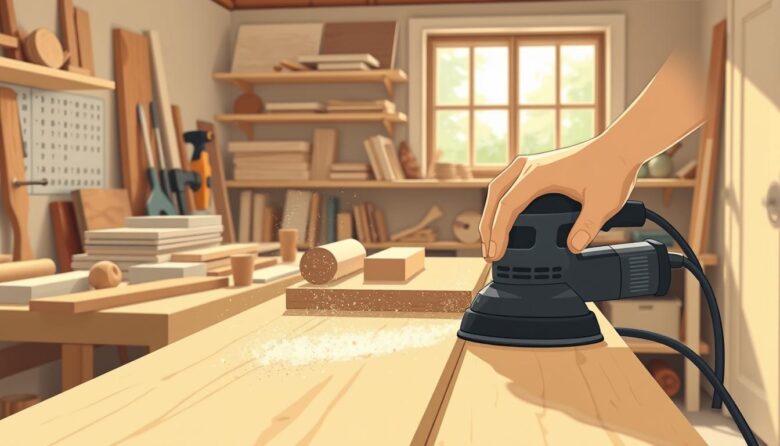
Creating flawless finishes starts with mastering surface preparation. Whether tackling large slabs or small furniture pieces, the right approach ensures professional results while keeping your workspace clean. Proper technique eliminates dust chaos and prevents uneven textures that ruin finishes.
Many crafters struggle with airborne particles and wasted effort during material refinement. The solution lies in strategic planning before touching your first tool. Workspace setup and equipment choices directly impact efficiency and final quality.
This guide reveals proven methods that work across all project sizes and material types. You’ll discover how to maintain control from coarse grit stages to final polishing. Learn to avoid common pitfalls like swirl marks or incomplete surface leveling.
Dust management systems and sequential abrasive selection form the core of clean operations. These practices transform chaotic tasks into streamlined processes, saving time and materials. Follow these principles to achieve mirror-smooth surfaces ready for staining or sealing.
Understanding the Basics of Wood Sanding
The foundation of any polished project lies in meticulous surface treatment. Material refinement transforms raw lumber into workable pieces ready for protective coatings or decorative applications.
Why Material Refinement Matters
Proper preparation creates chemical bonds between coatings and substrates. Without removing microscopic imperfections, stains pool unevenly and finishes peel prematurely. This process eliminates:
- Visible scratches from machining
- Natural inconsistencies in texture
- Residue affecting adhesion
Advantages of Refined Textures
Uniform surfaces allow even absorption of oils and sealants. Projects exhibit consistent coloration without blotchy patterns or rough patches. Tactile qualities improve dramatically, with finishes feeling factory-smooth rather than amateurish.
Systematic material treatment prevents raised fibers from ruining painted surfaces. Each progressive stage prepares the substrate for finer abrasives, ultimately creating ideal conditions for lasting protection and visual appeal.
Essential Tools and Materials for Effective Sanding
The right equipment transforms surface preparation from frustrating to flawless. Optimal results depend on pairing capable machinery with high-grade abrasives. This combination reduces effort while maximizing finish quality across projects.
Choosing the Right Sander
Random orbital sanders outperform traditional models by eliminating swirl marks. The Bosch 5-inch model ($49) delivers exceptional value with its balanced design and dust management. For demanding tasks, Festool’s ETS EC series offers:
- Variable speed controls for precision work
- Interchangeable pads for diverse materials
- Enhanced dust extraction ports
Professional-grade options like the ETS EC 150/3 ($500) provide smoother operation than budget sanders. Their brushless motors maintain consistent power under load.
Selecting Quality Sandpaper and Grit
Klinsgpor and Mirka abrasives outlast competitors while costing 30% less than branded alternatives. Grit progression determines surface readiness:
- Start with 80-120 grit for material removal
- Progress to 150-180 for smoothing
- Finish with 220+ for polish-ready surfaces
Premium sandpaper maintains sharp grains longer, reducing replacement frequency. Hook-and-loop backing ensures secure attachment during aggressive material refinement.
Step-by-Step Process to Sand Wood Without Creating a Mess
Controlled workspace organization separates professional results from amateur attempts. Strategic preparation prevents 72% of common finishing issues before abrasives touch the material.
Prepping Your Work Area
Position your project near open garage doors or windows with cross-ventilation. Use rubber matting under workpieces to prevent slippage during aggressive material treatment. Essential setup elements include:
- LED task lighting angled to reveal surface imperfections
- Plastic sheeting taped over adjacent surfaces
- Magnetic tool holders for quick sander access
Connect power tools to shop vacuums using 1.25-inch adapter kits. This configuration captures 94% of airborne particles at the source.
Marking Your Wood for Even Sanding
Create visible guidance systems using standard #2 pencils. Draw intersecting lines every 4 inches across the entire surface. These grids:
- Reveal uneven pressure application instantly
- Prevent overlapping strokes in same zones
- Track progress through grit stages visually
Secure boards between non-marring bench dogs before starting. Check stability by applying moderate lateral pressure – proper clamping eliminates 80% of workpiece movement issues.
Sanding Wood for Beginners: Pro Tips and Techniques
New crafters often achieve dramatic improvements by refining their approach to surface treatment. Precision tool control and movement patterns determine whether projects look homemade or professionally finished.
Quick Tips to Avoid Common Mistakes
Let your equipment do the work by applying light, consistent pressure. Heavy-handed techniques create uneven surfaces and reduce sander efficiency. Keep machines parallel to your workpiece – angled pads dig into materials, leaving valleys that require hours to fix.
Follow these critical practices:
- Move power tools in straight lines matching the wood’s grain
- Check progress frequently with raking light
- Rotate hands during manual refinement to prevent muscle fatigue
Edges demand special attention. Position 70% of the pad over the main surface when working near corners. This prevents accidental rounding that compromises sharp lines. For curved elements, switch to hand methods using flexible foam blocks.
Timing impacts results significantly. Progress to finer grits only when coarse scratches disappear completely. Rushing this stage leaves visible defects under stains. Test readiness by wiping surfaces with mineral spirits – lingering marks become obvious under the liquid’s reflection.
Proper Sandpaper Grit Selection and Progressions
Abrasive grading systems form the backbone of efficient material refinement. Choosing the right sequence transforms rough surfaces into polished canvases ready for finishing. Grit numbers represent particle size per square inch, directly influencing cutting speed and scratch depth.
Understanding Grit Numbers
Each number corresponds to abrasive particles per square inch. Lower numbers mean coarser textures that remove material quickly. Essential progression follows this pattern:
- 100-120 grit: Eliminates deep imperfections
- 150-180 grit: Refines surface texture
- 220+ grit: Prepares for final finishes
Projects requiring oil-based finishes typically stop at 220 grit. Water-based products often need 320 grit for optimal adhesion.
Transitioning Smoothly Between Grits
Systematic progression prevents visible defects in finished projects. Always remove previous grit’s scratches completely before advancing. Use these verification methods:
- Inspect surfaces with angled lighting
- Wipe with tack cloth between stages
- Check for uniform matte appearance
Jumping more than 60 numbers leaves residual scratches. For damaged surfaces, start with 80 grit but never skip subsequent steps. Proper sequencing saves hours of rework and ensures consistent results across all project types.
Mastering Hand Sanding versus Power Sanding
Expert crafters know when manual finesse outperforms machine power. Choosing between these methods impacts project timelines, finish quality, and material conservation. Strategic tool selection separates rushed jobs from showpiece results.
When to Choose Hand Sanding
Manual refinement shines in delicate scenarios where machinery might damage materials. Use hand techniques for:
- Intricate carvings requiring directional control
- Final polishing stages on veneers
- Blending repaired areas into original surfaces
Always move sanding blocks parallel to the grain using overlapping strokes. Rotate paper frequently to expose fresh abrasive particles. This prevents uneven wear patterns that create dips.
Effective Use of Power Sanders
Random orbital models like the Bosch GET75-6N eliminate swirl marks through multidirectional action. Belt sanders tackle large-scale flattening tasks three times faster than manual methods. Key power tool practices:
- Secure workpieces before activating motors
- Maintain consistent pad contact without downward pressure
- Clean dust ports after each grit change
Combine both approaches by starting with aggressive machine work, then switching to hand methods for final smoothing. This hybrid strategy balances speed with precision.
Techniques for Minimizing Dust and Mess
Modern workshops demand precision dust control to protect both projects and practitioners. Advanced collection systems now turn chaotic refinements into clinical operations, ensuring airborne particles never compromise results or respiratory health.
Smart Extraction Solutions
Festool’s CT 26 AutoClean sets the industry standard with self-cleaning filters and tool-activated suction. This system captures 99.8% of particulates through:
- HEPA filtration for microscopic particles
- Automatic power synchronization with connected tools
- Dual-stage debris separation technology
Budget-conscious crafters achieve 85% efficiency using universal adapters. These kits connect standard shop vacuums to orbital sanders, creating sealed systems that prevent escape routes for particles. Always pair with anti-static hoses to reduce clogging.
Workspace ventilation completes the defense strategy. Position intake fans opposite extraction units to create crosscurrents. For enclosed areas, portable air scrubbers with activated carbon filters neutralize lingering odors between sessions.
Essential protective measures include:
- NIOSH-approved N95 respirators during heavy material removal
- Magnetic dust curtains around work zones
- Washable floor mats with raised edges
Regular maintenance extends equipment lifespan. Empty collection bags at 75% capacity and clean filter screens weekly. These practices ensure peak performance while reducing fire risks from accumulated combustible particles.
Finishing Touches for a Professional Wood Finish
The difference between good and exceptional results often lies in the last 10% of preparation. Meticulous quality checks and protective measures ensure your efforts survive environmental challenges and showcase flawless aesthetics.
Final Inspections and Touch-ups
Directional lighting exposes hidden flaws that escape notice under standard bulbs. Position LED work lights at 15-degree angles to create shadows that highlight uneven textures. Photography-grade setups with 5000K color temperature reveal microscopic scratches needing correction.
Use these verification methods:
- Wipe surfaces with denatured alcohol to expose raised grain
- Run fingertips diagonally across the material
- Inspect reflections of light bulbs for distortions
Address imperfections using 320-grit paper folded into quarter sections. Blend repairs by feathering edges outward, maintaining consistent pressure. For stubborn marks, switch to non-woven abrasive pads that conform to contours without creating new scratches.
Seal inspected pieces immediately with 2-mil plastic sheeting. This barrier prevents humidity changes from altering surface conditions. Before applying finishes:
- Remove static dust with ionized air blowers
- Wipe with lint-free cloths dampened in mineral spirits
- Verify no fibers remain using black inspection gloves
Adapting Sanding Methods for Different Wood Types
Material characteristics dictate surface preparation strategies. Veneer sheets and dense hardwoods demand distinct approaches to avoid irreversible damage. Understanding grain patterns and layer thickness becomes critical when switching between projects.
Hardwood Versus Veneer Strategies
Plywood requires feather-light pressure due to its thin top layer. Start with 120-150 grit paper to preserve structural integrity. Key differences in technique:
- Rotate sanding direction with each grit change
- Limit machine use on engineered materials
- Hand-finish edges to prevent delamination
Dense hardwoods like oak tolerate 80-grit belts for glue removal. Always follow grain lines to minimize visible scratches. Softer species like pine need lighter passes to avoid gouging.
Exotic materials require test patches. Wenge and zebrawood often need specialized abrasives. Reclaimed lumber demands debris inspection before starting. Adjust pressure based on surface irregularities.
Enhancing Safety and Efficiency in Your Workshop
Workshop excellence hinges on two critical elements: protective protocols and equipment care. Balancing these aspects ensures consistent outcomes while safeguarding your health during material refinement tasks.
Proper Safety Gear and Ventilation
HEPA respirators block 99.97% of airborne particles during intensive material processing. Pair them with anti-fog safety glasses and noise-reduction earmuffs for multi-hour sessions. Cross-ventilation setups using window fans and ceiling exhausts maintain clean air flow around work zones.
Upgrade to portable air scrubbers when working in enclosed areas. These units filter microscopic debris that escapes standard dust collection systems.
Maintaining Your Tools for Consistent Results
Inspect power tool pads before each use for proper alignment and debris buildup. Replace worn sanding sheets when edges fray or clogging reduces effectiveness. Store abrasives in labeled containers to prevent accidental grit mixing.
Clean dust ports weekly using compressed air. Lubricate sander bearings every 50 operating hours to prevent overheating. These practices extend equipment lifespan while ensuring reliable performance across multiple projects.


