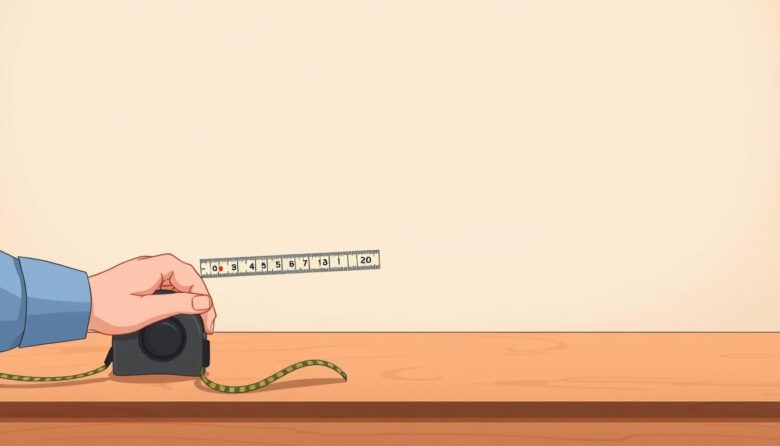
Every successful project starts with a single, precise measurement. The humble tape measure is the cornerstone tool for professionals and DIYers alike. Its ability to deliver reliable numbers makes it indispensable for countless tasks.
This flexible ruler has a rich history. It evolved from cloth tapes used by tailors to the modern retractable design patented by Hiram Farrand. Today, this essential instrument helps millions achieve their goals.
Mastering this tool is about more than just reading numbers. Proper technique ensures accurate measurement every time. This leads to better project outcomes and saves valuable materials.
Our guide covers everything from basic parts to advanced strategies. Whether you’re tackling a major home renovation or a simple repair, these skills are vital. You will learn to confidently handle any measuring challenge.
Understanding Tape Measure Anatomy and Markings
A tape measure’s accuracy depends on recognizing its various parts and scale systems. Knowing how each component functions ensures precise results for every project.
Overview of Tape Measure Components
The metal hook at the blade’s end features a floating design. This intentional movement compensates for the hook’s thickness during measurements.
Rivets secure the hook to the stiff metallic blade. This construction maintains rigidity when extended while allowing smooth retraction.
The case houses the blade and may include length compensation features. Some advanced models have known case dimensions for internal measurements.
Decoding Metric and Imperial Scales
Metric scales show centimeters and millimeters with clear numbering. Each centimeter contains ten millimeter spaces for detailed measurement.
Imperial systems use large numbers for whole inches. Fractional marks indicate halves, quarters, eighths, and sixteenths of an inch.
Understanding that one foot equals twelve inches is crucial. Each inch contains specific fractional increments for precise work.
Specialized tapes feature truss indicators and stud markings. These professional-grade features expand measurement capabilities for specific trades.
Using a Tape Measure Effectively: Tips and Best Practices
The difference between amateur and professional results often comes down to measurement methodology. Proper execution builds confidence and ensures project success from start to finish.
Proper Hook Use and Tension Control
External measurements require placing the metal hook around the object’s edge. Gently pull toward yourself to secure the blade in position.
This technique compensates for the hook’s thickness automatically. Internal measurements work differently—push the hook firmly against one surface.
Modern tools feature tension-control brakes that lock the blade securely. This prevents retraction during critical accurate measurement tasks like shelf installation.
Step-by-Step Measuring Techniques for Accuracy
Begin by extending the blade smoothly from its case. Guide it to the desired length without forcing or twisting.
Reading fractions involves adding increments between inch marks. For example, one inch plus a quarter mark equals 1¼ inches.
Maintain direct line of sight perpendicular to the blade. This avoids parallax errors that compromise measurement precision.
Double-check critical dimensions before making cuts. Consistent technique ensures reliable results across all projects.
Practical Applications for Home and Construction Projects
Applying tape measure skills to real-world projects transforms theoretical knowledge into tangible results. This section explores specific techniques for common tasks.
You will learn to adapt your approach for different scales and environments.
Measuring Interior and Exterior Spaces
For room dimensions, measure each wall separately. Start from one corner and extend the blade to the opposite point.
Add these individual lengths for the total perimeter. This method is essential for ordering flooring or baseboards.
Outdoor projects often require longer tapes. These tools frequently include a crank for smooth, safe retraction over many feet.
When measuring a deck or facade, ensure the blade is straight and level. An accurate measurement prevents material waste.
For window frames, take width and height readings at three different points. This accounts for any settling or irregularity in the opening.
Adapting Techniques for Carpentry and DIY Tasks
Carpentry demands precision. Use the specialized marks on your tool for efficient work.
Stud indicators, often at 16-inch intervals, help quickly locate framing members behind walls. This saves time during installation.
In tight spaces, a tape with a known case length is invaluable. You can butt the case against one wall for an internal measurement without bending the blade.
For DIY tasks like hanging pictures, measure and mark a light pencil line on the wall. This ensures your items are level and correctly spaced.
Always double-check critical dimensions before cutting materials. This simple habit is the hallmark of a professional finish.
Maintaining Safety and Tool Integrity
Many injuries occur during tape measure retraction rather than extension. The high-speed return of the metal blade poses significant risks that require careful management. Understanding these hazards protects both users and the tool itself.
Safe Blade Retraction and Hook Management
Never allow the blade to snap back uncontrolled. Apply light thumb pressure near the case opening during retraction. This controlled method prevents the hook from whipping dangerously.
Always wear safety glasses when working with this tool. The metal end piece can become a projectile at high speeds. Even quality blades have edges that become hazardous during fast retraction.
Guide the tape back smoothly to maintain its integrity. This practice prevents kinking and mechanism damage. For longer measures, use the side crank for controlled return.
Regular inspection identifies wear before it causes problems. Check for bent hooks, damaged markings, or cracked cases. Replace any tool with sharp spots or burrs on the blade.
Use belt clips to secure the device when working at height. Position it on your side to avoid snagging hazards. Proper storage extends the life of your measuring equipment.
Final Insights and Next Steps for Mastering Your Tape Measure
Mastering your tape measure unlocks a new level of confidence and precision in all your projects. This guide has equipped you with the essential knowledge of its parts, markings, and proper techniques.
Your next step is consistent practice. Begin with simple tasks around your home to build skill. Gradually tackle more complex applications as your comfort grows.
Choosing the right tool is critical. Consider blade length, material, and whether you need metric, imperial, or dual-scale markings. Quality tools with clear numbers and durable cases provide accurate results for years.
Remember key lessons: avoid parallax errors, account for the hook, and always double-check critical numbers. Keep your tool clean, store it properly, and replace it if markings wear.
This foundational skill empowers you to achieve professional-quality outcomes. With practice, you will handle any measuring challenge with assurance.