A power drill stands as one of the most versatile and essential tools for any DIY enthusiast or homeowner. This incredible device handles tasks from drilling tiny holes for delicate crafts to creating larger openings for fixtures.
Mastering the operation of this tool is fundamental for tackling various home improvement projects. Whether you are hanging shelves, building furniture, or installing drywall, proper knowledge is crucial.
While these devices might seem intimidating at first, understanding their basic components and safety protocols empowers any user. This confidence leads to more efficient work and safer conditions on every job.
This comprehensive guide provides a clear path from selecting the right equipment to mastering drilling techniques. We cover component identification, bit selection, operational settings, and maintenance practices for long-lasting performance.
These tools serve a dual purpose: drilling holes and driving screws. This makes them indispensable for a wide array of tasks around the home or workshop.
Investing time to learn proper operation saves time, prevents mistakes, and ensures safer working conditions. Our structured approach will help you maximize both safety and efficiency with your equipment.
Essential Safety Measures for Power Drill Use
Operating any tool effectively begins with a firm commitment to personal safety and workspace preparation. This foundational approach prevents accidents and ensures clean, professional results. Proper protocols are non-negotiable for both novice and experienced users.
Personal Protective Equipment (PPE)
Always wear safety glasses to protect your eyes from flying debris. Wood chips, metal shavings, and dust are common hazards during operation. Hearing protection is also crucial, especially during extended use or when working with hard materials.
Protect your hands and wrists from the tool’s torque. A model with a side handle offers superior control and distributes pressure evenly. If a side handle is unavailable, grip the tool firmly with both hands to maintain stability.
Workspace and Material Preparation
A safe environment is just as important as personal gear. Keep your area well-lit and free of clutter to avoid tripping or accidentally drilling into surfaces. Always secure your workpiece with clamps or a vise to prevent spinning or shifting.
Check that the bit is locked tightly in the chuck before starting. A loose bit can become a dangerous projectile. For clean exits, place a scrap piece of wood beneath the material you are drilling through.
Understanding the Key Components of Your Drill
Understanding the basic components of your tool helps you work smarter. Each part serves a specific function that contributes to overall performance. Familiarity with these elements ensures proper operation.
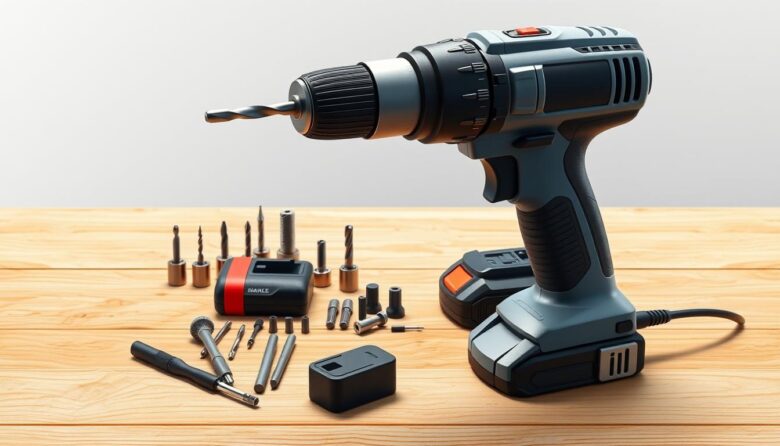
Chuck, Battery, and Torque Control
The chuck is the front clamp that holds bits securely. Most modern drills feature keyless chucks for easy adjustments. This eliminates the need for separate tools.
Cordless models rely on lithium-ion battery packs for mobility. Keeping a spare battery charged ensures uninterrupted work. This provides flexibility without outlet dependency.
Torque control adjusts rotational force through a numbered dial. Lower settings prevent damage to delicate materials. Higher torque settings handle demanding drilling tasks.
Trigger and Speed Settings Explained
The trigger switch activates the tool with variable speed control. Gentle pressure allows precise hole starting. Firm squeezing delivers maximum rotation speed.
A forward/reverse switch near the trigger controls direction. Clockwise rotation drives screws forward. Counter-clockwise motion removes fasteners efficiently.
The gear switch selects between speed ranges. Low gear provides high torque for screw driving. High gear offers rapid rotation for hole creation.
These power drills components work together for optimal performance. Understanding their functions improves your results with various materials.
How to Use a Power Drill
Proper operation begins with choosing the right equipment for your specific tasks. Lightweight 4V to 12V cordless models work well for occasional light-duty projects like hanging shelves. For frequent or heavy applications, 18V to 20V models or corded units deliver better performance.
Before you use drill for any project, make sure the battery is fully charged or the power cord is securely connected. Always inspect your equipment to make sure all components function properly. Check that the chuck rotates smoothly and the trigger responds correctly.
These versatile tools serve dual purposes—boring holes with drill bits or driving screws with driver bits. Switching between functions requires only a bit change and setting adjustment. This flexibility makes the power drill indispensable for various projects.
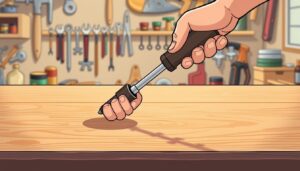
When learning to use drill effectively, start with simple projects using softer materials like pine wood. Position yourself with stable footing and clear visibility of the work area. Maintain control throughout the operation without awkward reaching.
Practice proper grip technique by holding the pistol grip firmly with your dominant hand. Support the tool body or side handle with your other hand for steady control. Patience and preparation are key—rushing setup often leads to poor results and safety risks.
Selecting the Right Drill Bit for Every Task
The performance of your tool hinges directly on the drill bit you select for the job. Using the correct bit ensures clean holes, prevents material damage, and extends the life of your equipment. This choice is fundamental to professional results.
Common types include twist, spade, Forstner, and hole saw bits. Each serves a distinct purpose. Twist drill bits are the most versatile, handling smaller holes in wood and metal.
Matching Bit Type to Material
Always match the bit to your workpiece material. Standard bits work for wood and soft metals. Masonry bits feature carbide tips for concrete. Specialized bits are required for glass or ceramic.
For large holes in wood, a spade bit offers efficiency. A Forstner bit creates exceptionally clean, flat-bottomed holes. Hole saws are ideal for the largest diameters, cutting completely through the material.
Creating Pilot Holes for Screws
Driving a screw into wood often requires a pilot hole. This guide hole prevents the wood from splitting. It also ensures the screw goes in straight.
Select a drill bit with a diameter matching the screw’s core. This is the shaft without the threads. A proper pilot hole makes screw driving effortless and accurate.
Setting Up Your Drill for Optimal Performance
Fine-tuning your drill’s settings transforms it from a basic tool into a precision instrument for professional results. Correct configuration prevents material damage and extends equipment lifespan. Proper adjustment ensures efficient operation for various tasks.
Begin by selecting the appropriate gear setting on your tool’s top switch. Setting 1 delivers low speed with high torque, ideal for driving screws and drilling large holes. Setting 2 provides high speed with lower torque, perfect for standard drilling operations.
Adjusting Speed and Torque Settings
The numbered dial around the chuck controls torque output for screw driving tasks. These settings determine rotational force before the clutch engages. Start with mid-range numbers and adjust based on performance.
If the setting is too low, the drill will stop with a clicking sound before screws seat properly. Excessive torque causes driver bits to slip and strip screw heads. For drilling holes, always select the drill symbol or highest number to maintain consistent power.
Different materials require specific configurations. Hardwoods need lower speeds with higher torque for control. Softer materials handle faster rotation without issue. Experiment on scrap pieces to find optimal settings for your project.
Variable speed triggers offer additional control beyond basic settings. Gentle pressure provides precision for starting holes. Firm pressure delivers maximum rotation when needed. This combination of mechanical and manual controls creates versatile performance.
Mastering Chuck Operations and Directional Controls
Correct bit placement and directional settings prevent accidents and improve work quality. These fundamental skills ensure your equipment operates safely during every project.
Proper handling of the chuck mechanism forms the core of efficient operation. Understanding rotation direction completes this essential knowledge set.
Securing the Bit Correctly
Begin by loosening the chuck with a counterclockwise turn. Insert the smooth shank portion of your bit into the opened jaws. Ensure the chuck clamps onto flat shank surfaces only.
Tighten the chuck clockwise by hand until snug. For extra security, hold the chuck body and gently pull the trigger. This power-assisted method creates a firm grip.
Always verify the bit is secure before starting work. Attempt to pull it out with your hand. If it moves, tighten further to prevent slipping hazards.
Directional controls require equal attention. Set the forward/reverse switch before placing the bit against material. Clockwise rotation drives forward for drilling and screw driving.
Counterclockwise motion serves reverse functions. Use this setting for removing screws or extracting stuck bits. Never change direction while the tool is under load.
Always ensure the switch sits in the center locked position during bit changes. This safety measure prevents accidental activation. Proper chuck and directional mastery ensures reliable performance.
Effective Techniques for Drilling and Driving Screws
Effective operation for creating holes and installing screws relies on a combination of correct angle, steady pressure, and controlled motion. Mastering these fundamentals leads to cleaner results and prolongs the life of your equipment.
Maintaining Proper Angle and Pressure
Begin by placing the tip of your bit on the marked spot. Hold the tool at the correct angle, typically perpendicular to the material surface for a straight hole.
Start with gentle trigger pressure to create a small starting groove. This prevents the bit from wandering. Once the groove is established, gradually increase speed.
Apply constant, steady forward pressure. Let the tool’s sharp bit do the cutting. Forcing it can strain the motor or break the bit. The drill’s own weight often provides sufficient pressure for downward drilling.
For horizontal or overhead work, apply gentle guiding pressure with your supporting hand. Find the balance where the equipment cuts efficiently without bogging down.
Clean Exits and Hole Examination
After the bit penetrates completely, keep it spinning forward as you withdraw. This rotation helps clear debris from the hole and creates a smoother exit point.
When driving screws, seat the driver bit fully into the screw head. Start at a low speed to ensure proper engagement. Increase speed as the screw begins to thread into the material.
Always examine each hole after completion. Check for correct size and depth. If a fastener is tight, slightly enlarge the hole with a larger bit.
For wood prone to splitting, drilling a pilot hole first is essential. This prevents splitting and allows the screw threads to grip effectively.
Maintenance and Care for Long-Lasting Performance
Regular upkeep transforms quality equipment into long-term workshop investments. Proper maintenance ensures your tools deliver consistent results and remain reliable for years. A disciplined approach prevents premature failure and extends service life significantly.
After completing any project, develop a systematic cleanup routine. This protects your investment and prepares equipment for future tasks.
Regular Cleaning and Bit Storage
Always remove drill bits from the chuck immediately after use. Wipe them clean with a dry cloth to remove debris. Store bits in organized cases to prevent damage.
Sharp drill bits cut cleaner and require less pressure. Dull bits strain the motor and create safety hazards. Inspect bits regularly for signs of wear and replace damaged ones promptly.
Keep the chuck mechanism clean by occasionally opening it fully. Wipe away accumulated dust that could affect performance. This ensures proper bit securing during operation.
Battery and Drill Upkeep
For cordless drill models, battery care is crucial. Place batteries in charging docks after use but avoid leaving them connected indefinitely. This preserves battery chemistry and extends lifespan.
Store lithium-ion batteries at partial charge in cool, dry locations. This maintains optimal performance during extended storage periods. Proper battery management ensures ready power when needed.
Vacuum debris from ventilation slots after each session. Blocked vents can cause overheating and motor failure. Periodically check housing screws to ensure they remain tight.
Final Insights on Safe and Efficient Drill Operation
With these fundamental skills mastered, your drill becomes a trusted partner for countless home improvement projects. This comprehensive guide provides the foundation for tackling tasks with confidence and precision.
Safety remains the non-negotiable priority for every user. Consistent use of protective gear and proper material securing prevents accidents. Always maintain a firm grip and stable footing for full control.
Understanding your tool’s settings is crucial. The relationship between speed, torque, and direction allows you to optimize performance. This knowledge prevents stripped screw heads and damaged materials.
Regular maintenance ensures your cordless drill delivers reliable service for years. Keep bits sharp and organized. Follow correct battery charging practices to preserve power.
Whether driving screws into wood or drilling holes in metal, this guide serves as your essential reference. Apply these principles to achieve professional results on all your future projects.