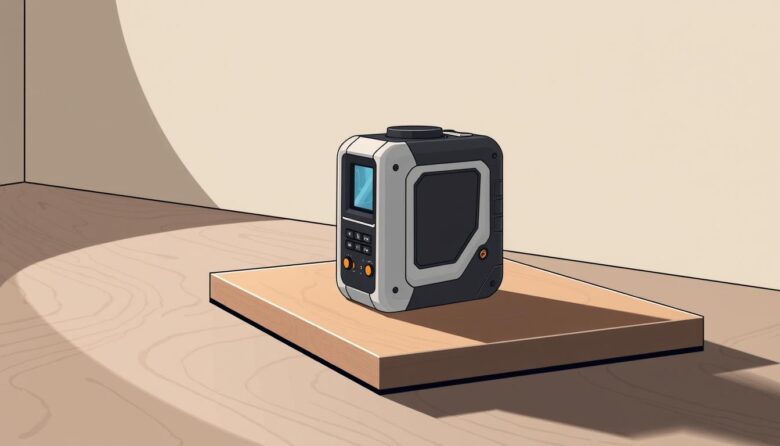
Hanging heavy items on your wall requires more than just a hammer and nails. A stud finder becomes your essential partner for any mounting project. This handheld device ensures your shelves, mirrors, and televisions stay securely in place.
Studs are the strong wooden or metal beams hidden behind drywall. They provide the structural support needed for heavy objects. Finding these supports prevents dangerous accidents and wall damage.
This guide teaches you proper techniques for locating studs with precision. You will save time and avoid costly mistakes. Professional results become achievable for any DIY enthusiast.
Different stud finders use various technologies to detect density changes. Mastering scanning techniques ensures reliable outcomes for your projects. From picture frames to heavy shelves, secure installations become simple.
Understanding the Basics of Stud Finders
Professional-grade wall installations start with mastering stud detection technology. These tools help locate the hidden supports behind your walls. Different models use various approaches for this critical task.
How Stud Finder Technology Works
Most devices operate on density detection principles. They identify changes in wall composition between hollow spaces and solid framing members. Electronic models use sensors to measure these variations accurately.
Magnetic versions locate metal fasteners securing drywall to studs. This method provides reliable results for basic projects. Radar-based units offer the most advanced approach with electromagnetic wave technology.
Exploring Magnetic, Electronic, and Radar Types
Magnetic stud finders represent the most affordable option. They require no batteries and work by detecting screws and nails. These tools are ideal for occasional DIY users with simple needs.
Electronic stud finders provide superior accuracy for both wood and metal studs. Many include edge detection for precise measurements. Some models feature live wire detection for enhanced safety.
Radar-based units create detailed images of everything behind walls. They display stud locations, pipes, and electrical wiring on LCD screens. This technology offers the highest level of information for complex projects.
Preparing Your Wall and Your Tool
The success of your mounting project begins with careful preparation of both wall and tool. Proper setup prevents scanning errors and ensures reliable detection of structural supports.
Wall Preparation for Accurate Readings
Clear the area completely before starting your scan. Remove pictures, shelves, and decorative items from the wall surface. This eliminates interference with the device’s density detection capabilities.
Mark your intended scanning zone with a pencil for systematic coverage. Turn off nearby electrical appliances to prevent signal disruption. Keep furniture and curtains away from the work area.
Calibrating Your Stud Finder for Optimal Performance
Calibration establishes a baseline for your device. Place the tool on a section of drywall without any studs. Press and hold the calibration button until the correct icon appears.
Wait for visual and audio confirmation that setup is complete. This crucial step ensures maximum accuracy for each scanning session. Always follow manufacturer instructions for your specific model.
Proper calibration guarantees the device recognizes density variations correctly. This prevents false readings and saves time during the actual detection process.
Using a Stud Finder: Step-by-Step Guide
With your wall prepared and tool calibrated, the actual detection process begins with systematic scanning. Begin by inserting fresh batteries and powering on your device. Place the unit against one end of your drywall surface.
Proper scanning technique requires slow, consistent movement. Glide the tool horizontally while maintaining firm contact. Watch for initial signals like beeps or lights indicating density changes.
Approach each potential stud location from both directions. This method helps identify both edges accurately. Look for the “EDGE” indicator on your display as you move the finder slowly across the surface.
When you reach the center point, you’ll see full signal bars and a “CENTER” message. Most devices also sound a buzzer at this precise location. Remember that standard framing members measure about 1-1/2 inches wide.
Proper Scanning Techniques and Safety Measures
Always move your detection tool at a steady pace. Rushing can cause missed readings or false signals. Some advanced models include wiring detection features for added safety.
Use these electrical detection functions before drilling. This precaution prevents dangerous encounters with hidden cables. Safety should remain your top priority throughout the project.
Marking the Stud Locations Accurately
Mark both edges of each detected stud with a pencil. These clear reference points guide your installation. Continue scanning horizontally to locate additional framing members.
Verify your marks by measuring between them. Standard spacing is 16 inches from center to center. This creates approximately 14-1/2 inches between stud edges.
Some older homes may have 24-inch spacing instead. Your measurements will confirm the pattern. This verification step ensures reliable results for secure mounting.
Tips and Tricks for Enhanced Accuracy
Achieving professional results with your stud finder requires mastering advanced techniques that go beyond basic operation. These methods significantly improve detection reliability and help you avoid common pitfalls.
Performing Multiple Scanning Passes
Never rely on a single pass across your wall. Conduct several scans over the same area for thorough coverage. Start from one end and move systematically to the other.
Overlap each pass slightly to catch any framing members missed initially. This meticulous approach ensures you locate every potential support location.
Interpreting Signals and Avoiding False Readings
Different models communicate findings through beeps, lights, or screen displays. Learn your specific device’s signals for edges and center points.
Combine electronic readings with visual inspection. Look for subtle clues like nail heads or slight wall bulges near baseboards.
Begin your search near electrical outlets, as building codes often place studs alongside these fixtures. This provides a reliable starting point.
Advanced units offer critical safety features. They can detect live electrical wiring and differentiate between wood studs and metal pipes. Understanding these modes prevents hazardous mistakes and ensures true positive readings for your project.
Troubleshooting Common Issues and Exploring Alternative Methods
Understanding common detection issues helps maintain project momentum and prevent installation errors. Technical difficulties can arise with any equipment, but systematic approaches restore reliable performance.
Dealing with Inconsistent or False Readings
Begin troubleshooting by checking power sources. Low batteries frequently cause unreliable performance in electronic models. Replace them with the correct voltage type for optimal function.
Environmental interference often creates false signals. Metal objects or wiring near walls disrupt scanning accuracy. Moving these items or changing your angle resolves many detection problems.
Thick construction materials challenge standard equipment. Concrete or multilayer drywall may exceed penetration capabilities. Proper calibration before each use establishes critical baselines for density measurement.
Finding Studs Without a Stud Finder
Traditional methods work when specialized tools are unavailable. Lightly tap walls while listening for solid thudding sounds. Hollow echoes indicate empty spaces between framing members.
Visual inspection provides another approach. Shine a flashlight at shallow angles across surfaces. Look for subtle texture changes or shadows indicating fastener locations.
Building standards offer reliable reference points. Measure 16 or 24 inches from electrical outlets where codes typically require support. Removing switch plates allows direct visual confirmation of stud presence behind walls.
These techniques for locating studs without electronic assistance work in emergencies. However, they lack the precision of dedicated detection equipment for consistent results.
Finishing Touches for a Secure, Professional Installation
Your final step transforms precise detection into lasting security for wall-mounted objects. Mark both edges and the exact center of each stud with a pencil. This creates a clear guide for fastener placement.
Painter’s tape offers a highly visible method for temporary marking. It is easily removed before painting or wallpapering. This technique saves time during your project.
Accurate identification of the stud location is critical for safety. Hitting the solid wood center provides maximum holding power. This prevents heavy shelves or televisions from falling.
These tools are versatile for many tasks beyond hanging pictures. They help with mounting TVs, light fixtures, and other objects. Always verify you have hit solid wood before hanging anything.
After completing your work, proper care extends the life of your equipment. Remove batteries to prevent corrosion. Store the device in a dry, protected spot like a toolbox.


